How to use simple backing tracks with Onsong
Recently, I have managed to put together an easy setup for my simple backing tracks using Onsong. You don’t have to be a sound producer to make this work. A basic understanding of working with a DAW (digital audio workstation) app is required, though. This is something you can easily learn in a couple of hours or days. The time will depend on how deeply you want to go into how things work.
Why am I using backing tracks?
I play in a 50s and 60s cover band where I do all the singing and play the guitar which can be hard, especially in the summer when the temperatures and humidity are high. Instrumentals come to me as breaks for my voice. We play some instrumentals that sound fine with only one guitar but decided to leave out some that we used to play with two guitars which don’t sound that good with only one guitar.
So to make things easier by expanding the repertoire with the omitted instrumentals and adding some new ones, I thought it would be a good idea to have backing tracks play the rhythm guitar part. This way I can rest my voice when needed and still sound great at the same time.
How does it work?
What I achieved is this: When I change songs in Onsong with my Airturn PedPro page-turner pedal Onsong changes the preset on my HX Stomp which I use for guitar and the backing track that’s on my iPad starts to play.
To make this work in sync with the band you need to have your stereo audio signal that’s coming from the iPad split this way:
- The right channel plays the audio of the backing track. This is not a problem because the guitar part is a mono recording.
- The left channel has only a click track recorded on it.

I will explain how to route this a bit later.
What do I need?
A DAW app and audio interface
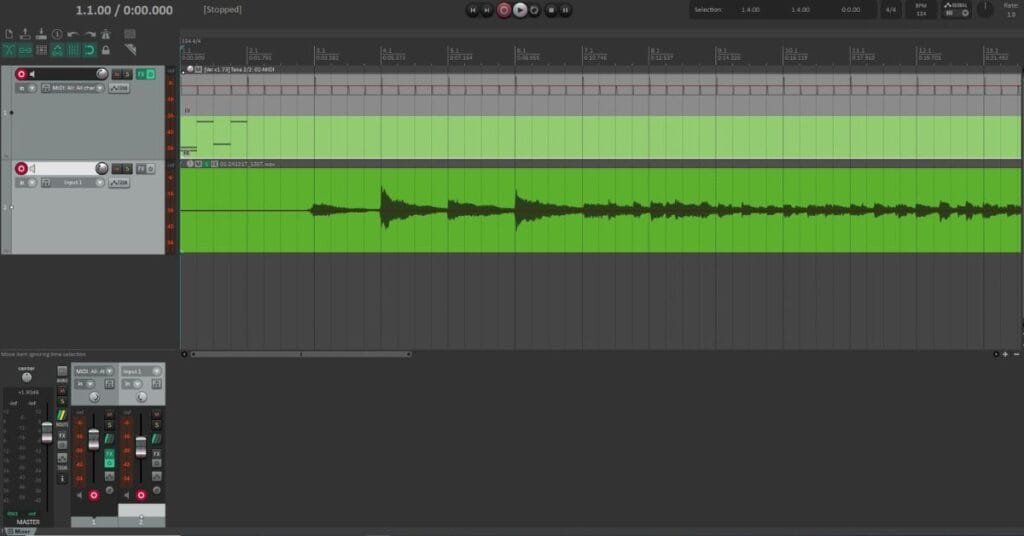
I had to record the rhythm guitar part first. To do this I used my HX Stomp which is also an audio interface and Reaper for my DAW.
You need to create two tracks, one for the guitar and one for the click. When exporting the recording be sure to pan the guitar 100% to the right and the click track 100% to the left. When exporting in stereo as an mp3 you will have the two things separated for further routing.

An iPad
This is where my backing tracks are stored. Onsong takes care of this for you.
Onsong
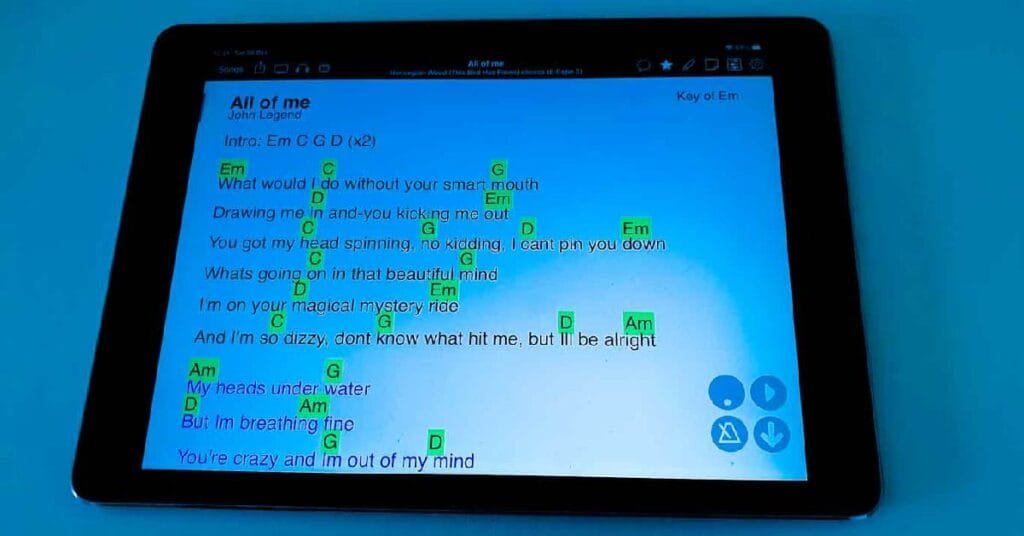
When I had my backing tracks saved on my iPad I had to import them into my Onsong library.
Next, I had to choose CUSTOM TRACKS to connect each song that uses a backing track with the corresponding MP3.
Although we are explaining how to do this with instrumentals that have no lyrics, I always have a file that represents the song. This is because the song’s file holds all the metadata we need for various things like backing tracks, MIDI, or light scenes. The song although an instrumental, also needs to have its place in the setlist.
There are two ways you can set up how the backing track will start playing.
- Automatically when turning to a song
- Manually by pressing the greyed-out PLAY button in the lower right corner of Onsong.
Audio cable
The goal is to send the signal from the iPad’s 3.5mm audio output to two separate channels on your mixer. There are a couple of cable variations you can use, it really doesn’t matter which one you use as long as it’s a stereo cable that is split into two mono outputs on the mixer’s side. The one without any adapters is a male 3.5mm TRS stereo jack plugged into the iPad and two male 6.5mm TS mono jacks plugged into two channels on the mixer.
I use a cable that has two RCA connectors with TS male adapters for the mixer side.


Routing the audio signals
I have the left mono side with the click track plugged into channel 13 and the right mono side plugged into channel 14 on my Behringer XR18R mixer.

Do not get confused with the click track being on the left mono jack and the backing track on the right mono jack. This doesn’t have to do anything with left or right in the FOH, it is the way to separate the two things. Later on, when mixing, they are treated as any other mono instrument that is fed to the mixer.
- The click track (channel 13) is then sent to whoever wants to hear it on their monitors. It doesn’t matter if it gets sent to a wedge floor monitor or an in-ear monitor as long as it doesn’t get sent to the FOH (front of house). The drummer needs to hear the click track, for the others it is optional.
- The guitar backing track (channel 14) is also sent to the monitors and to the FOH just like any other instrument that’s heard from the PA. I place it centered in the mix.
Wrapping things up
Now you have a better understanding of how simple backing tracks are played during gigs. Some musicians are happy with backing tracks and some don’t like to use them. It can be dictated by the type of music your band plays but not necessarily. I play retro music where backing tracks usually don’t get used, but in my case, they are used for only a portion of the songs that we play and for only one instrument-the rhythm guitar.
Remember, the backing track is for the band AND the audience, while the click track is ONLY for the band! This is the only thing that matters after everything is hooked up. How do you use backing tracks? What instruments do you play through your backing tracks? Leave a message in the comments section.