How to control Onsong and HX Stomp with MIDI?
Introduction
This is a simple and effective setup for anyone who sings and plays a guitar in a band or is a solo performer. I will show you how to change the song displayed in Onsong on your iPad’s screen and change the preset on your HX Stomp all with one step on your bluetooth page turner.
If you’ve never used MIDI, don’t go away, I will only explain what is needed for this setup in a step-by-step and easy-to-understand way.
My Story
I have been playing live gigs using OnSong for my music app for the last seven years and HX Stomp for the last five years. I also use an Airturn Pedpro Bluetooth page turner for OnSong.
When starting with OnSong I manually did the page-turning which was fine if I knew the lyrics if all the lyrics fitted on one page. The biggest problem was when I played solo acoustic gigs with a wider repertoire and songs with more lyrics than the songs that I played with my 50s and 60s cover band. Scrolling down during a song became a nightmare so I bought the Airturn Pedpro pedal which saved me!
Don’t get me wrong, changing the few presets that I use on the HX Stomp was not a problem, but I still had to step on it for most of the songs. I just thought, what if my iPad could do it for me? So after hundreds of gigs, I started wondering if I could make these guys work in sync for me. This is a simple way to control the main settings for OnSong and HX Stomp for every song I play with a simple one-press page turn.
There are many other apps and devices that can do this but this combination is the smallest and easiest to use. This is how I made it work, explained in detail.
What is MIDI?
None of this would be possible without the use of MIDI. I don’t know why, but whenever someone mentioned the word MIDI or I saw it written somewhere I would just turn around and go my own way. I just thought it was too complicated and never really cared about how it worked until recently.

MIDI (Musical Instrument Digital Interface) is just a simple set of information that allows musical instruments to communicate with each other. In the beginning, it was used only for synths but now it’s also widely used for guitar processors and individual effect pedals.
I don’t want to get into detail about how MIDI works, maybe some other time. For now, all you need to understand is this:
MIDI uses two types of messages:
- CC messages for changing parameters (delay time, feedback, etc.)
- PC messages for program changes (Sound presets)
Each message can have 128 different values. MIDI uses values from 0 to 127 which is 128 different values but some devices use values numbered from 1 to 128 which can be confusing. All you have to do is remember that when you have that situation, the “0” in the device that uses 0-127 is the same as “1” in the device that uses the 1-128 numbering, “5” in the first device is “6” in the other, and so on.
MIDI can communicate with up to 16 different devices in a group. Before we start editing any MIDI commands we have to assign each device a number between 1 and 16. The numbers represent a device’s name so every piece of gear knows each other’s name. For my setup, I am using the number “2” for the HX Stomp which will be explained later.
The chain of command
1. Airturn Pedpro to OnSong (iPad)

Think of it this way: The page-turner is the boss (Boss actually makes them too). When you press the right footswitch you change to the next song in your OnSong setlist. That’s step number one, telling the song app to change to the next song.
2. OnSong to HX Stomp
This is step number two: Each song in OnSong tells the HX Stomp which preset to change to with MIDI messages.

If we want to use more MIDI devices we can also make them receive messages from OnSong or the HX Stomp.
Connecting things
Page turner with OnSong
This is straightforward. The Airturn Pedpro has 6 modes. We need mode number 2 for simple page turning.
First, turn on Bluetooth on your iPad and turn wifi off if you are using it for something else like a digital mixer. Both don’t work for me. Now turn on the Pedpro by holding down the start / stop button until the red battery icon blinks 2 times, then release.

Now check if they are connected in the settings menu of the iPad.
If a song has lyrics that are longer than one page, one step on the footswitch will scroll down to the next page until it reaches the bottom. You will know you’ve reached the last page when OnSong shows the next song highlighted in light blue at the bottom of the screen. The next time you tap the right footswitch the lyrics change.

OnSong with HX Stomp
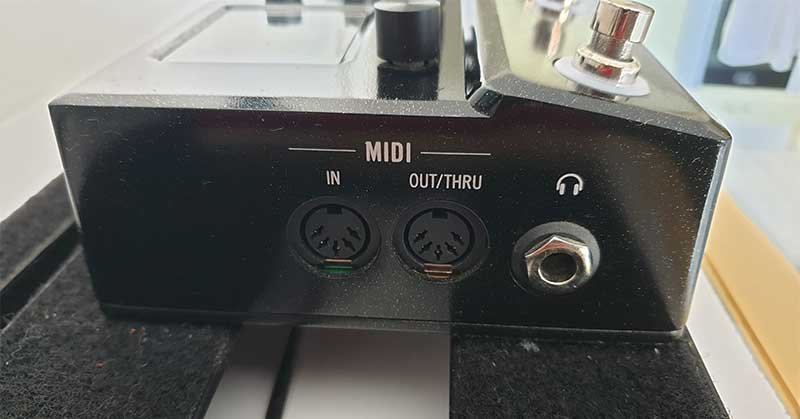
There are two ways to do this, with a USB “printer” cable (hardwired) or with a Bluetooth MIDI adapter (wireless). I will be talking about the cabled connection in this post.
Plug the USB-B connector into the HX Stomp.

The other end has a USB-A connector that you have to connect to a lightning to USB Camera Adapter for iPhone or iPad which then goes into your iPad.

Now that you have the iPad and HX Stomp physically connected you need to adjust some settings.
Onsong MIDI setup
First press the settings “gear” icon to see the “utilities” menu. Select “settings”.

1. Open the MIDI settings on the left side.
2. Enable the “MIDI enable” button.
3. Press “done”.
Now you have MIDI enabled for OnSong. In “Sources” you should see if your HX Stomp is connected to your ONSong app after setting up HX Stomp for MIDI.

HX Stomp MIDI setup
Press the two PAGE buttons simultaneously to enter the main menu.

Press the right PAGE button to scroll to the right.

Enter GLOBAL SETTINGS by pressing the knob underneath it.

In the GLOBAL SETTINGS scroll to the right with the upper right knob till you see the MIDI/Tempo icon highlighted.

The main thing to do is to assign your HX Stomp a number that will represent the device in the MIDI-controlled rig. You can pick any number from 1 to 16. I have picked number “2” for my Stomp.

Next, we have to set the input/output the right way. This section is found by scrolling to the right with the right PAGE button.
USB MIDI should be enabled by selecting “ON”. This tells the HX Stomp that you will be using the USB port for MIDI messages. Leave the other two settings selected MIDI+USB.

Now press the VIEW and ACTION buttons to enter SAVE mode and press SAVE to save all these settings for MIDI.


And that’s it, now you have Onsong and your HX Stomp set for communicating. Now let’s see how to create and send messages from ONSong to the HX Stomp.
How to create MIDI messages
This is the part where we create orders for each song in Onsong to be given to the HX Stomp. These orders are called MIDI EVENTS.
How to open the MIDI Events menu?
First press the pencil icon from the upper right menu. Then press the “i” icon in the upper left menu where the METADATA menu pops up.

Scroll to the bottom where you can find the MIDI section. We will be focusing on sending MIDI messages. You should see NONE on the right side as in RECEIVE.

Press the send button and you will see an empty screen with a “No MIDI events Added” title.

Adding MIDI events
To add a MIDI event press the “+” icon from the lower right menu.

After pressing “+” you get this menu:

From the TYPE menu select “Program” because we are telling the HX Stomp which program (Preset) to use for a particular song.
Select channel “2” which is our HX Stomp. If we selected no. 5 on the Stomp in global settings for MIDI then we need to select no. 5 here in ONSong as well.
From the PROGRAM menu select the number that represents the PRESET that you need. I have 116 selected. You will see all kinds of preset names in the list but don’t panic, this will be explained in the next section.
Leave the BANK section with “None” selected.
Press “Done” and you will see this screen. This is where you see which MIDI event will happen when Bad Moon Rising is selected. This MIDI event will send a PC (Program change) message with a value of “116” (Preset 39B=”CCR”) to channel “2” (HX Stomp).

A CC MIDI message can also be created choosing CONTROL instead of PROGRAM in the TYPE menu. Then we would see 2 MIDI events in this list.
Which number to choose?
The HX Stomp has 42 banks each with 3 presets: A, B, and C. That adds up to 126 (42×3=126) available memory slots for presets. The MIDI language has 128 possible commands it can send for each CC or PC command type. That makes sense. If the Stomp had more presets we wouldn’t be able to select them with MIDI. You have to do a bit of calculation here.
I have my “CCR” sound on preset no. 39B. Let’s translate that into MIDI. The previous 38 banks take up 114 (38×3) MIDI parameters. The next Stomp preset is my 39A which is 115 in MIDI. 39B is 116, and 39C is 117. You can remember which number represents each preset or better edit the program names in OnSong. Instead of “Woodblock” I typed in “CCR”. Just keep in mind that editing the names will be saved for the specific channel number you are using (channel 2 in our example).

Creating and adding Global MIDI Events
Instead of selecting any of these 128 parameters for each song you can save your most used presets as MIDI Globals for instant access. For this press the settings “gear” icon, then go to “Editors”, and select MIDI. Here you can add MIDI events the same way we described before, but you have to do it only once for all songs you need the preset for.


This is the menu where you see the list of MIDI Globals that have been created. You should have an empty list. I have 3 MIDI Globals created. Press “+” in the lower right menu to start creating a new MIDI Global event.

Here you give your new MIDI Global event a NAME, TAG, and by clicking the “Add MIDI Event” you create the MIDI Event the same way as described before. Only now you have the event saved for later use whenever needed.

Next time you add a new MIDI global event for a song when you open the TYPE menu in the first row of the MIDI Event menu choose GLOBAL at the bottom instead of PROGRAM.

After that select the desired MIDI Global you need and press Done.

Conclusion
In this article, we have learned how to use MIDI to change lyrics in ONSong and presets in HX Stomp at the same time using a Bluetooth page turner. This is a very easy setup that can upgrade your performance in many ways. It is a valuable setup for all singing guitarists and bassists.
The great thing about the use of MIDI is that we can add more devices that can be controlled with MIDI so there is no limit to experimenting with original gear setups and what they can do.
What kind of small MIDI setup do you use for gigs? Let me know in the comments section!


